How To: Setting Up Scheduled Reports In Microsoft Business Central
In Microsoft Business Central, there is a variety of reporting tools. Account Schedules, analysis by Dimension, connection to Power BI and the of course the standard reports provided within the system.
These standard reports can be printed, saved, sent or scheduled. In this video we will see how to schedule a report in Business Central.
Need Help With Microsoft Business Central?
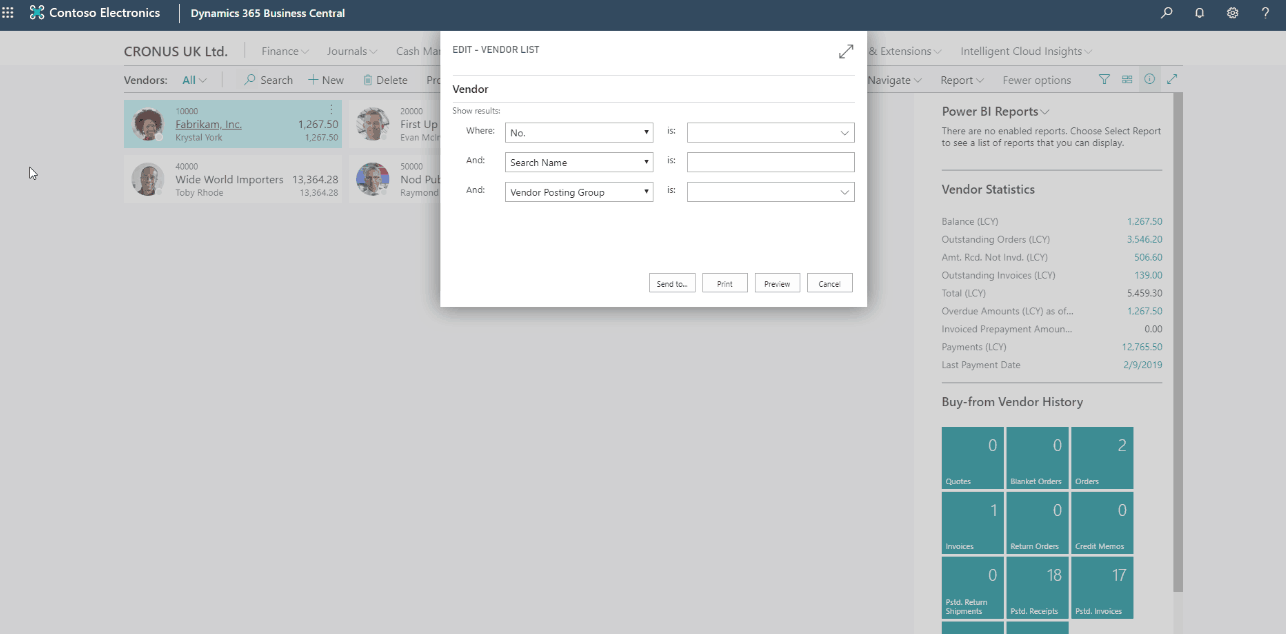
When running a report, the system will initially show the Request Page where you define the criteria and filters for the report.
Additionally, the request page includes action buttons at the bottom of the page to choose what to do with the report. Send to, Print or Preview.


To schedule a report press Send To and then choose Schedule and press OK.
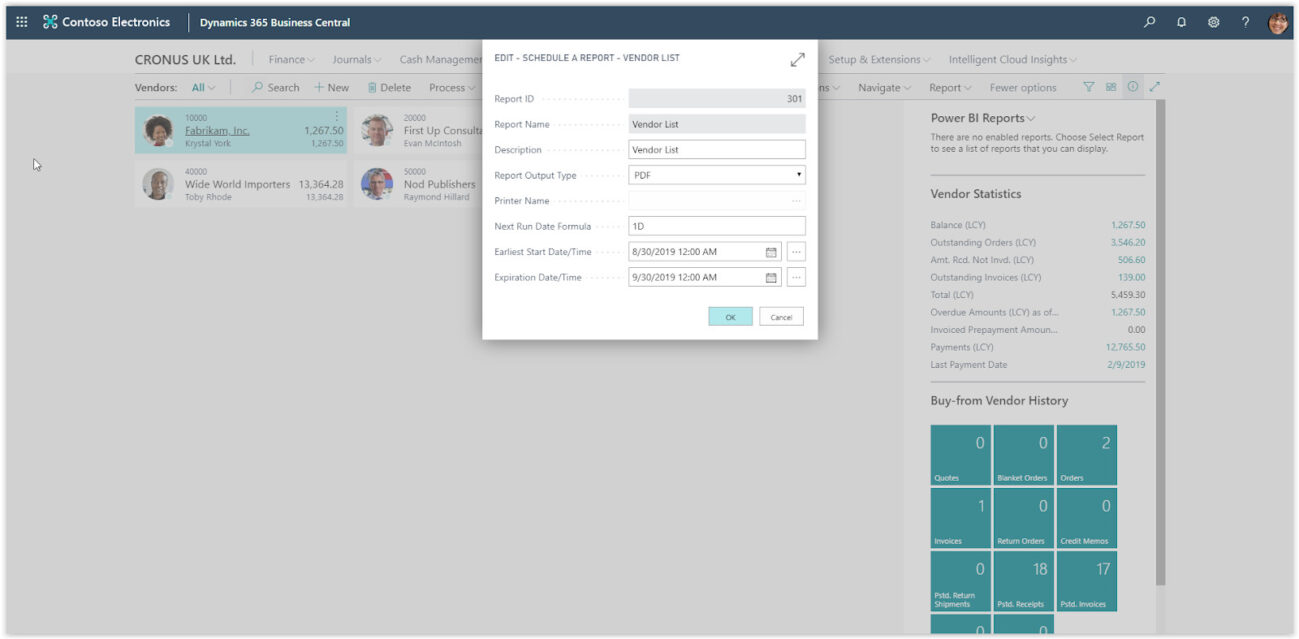
The Schedule options page will open where you will need to define how to run the report.
Select the Report Output Type to define how the report will be saved or if it will be printed. Define the Next Run Date Formula and the expiration Date.
Press OK, the report has been scheduled and a new Job queue entry has been created to run the report. In the case that you want to edit the schedule of the report you can open the Job Queue Entry and edit.
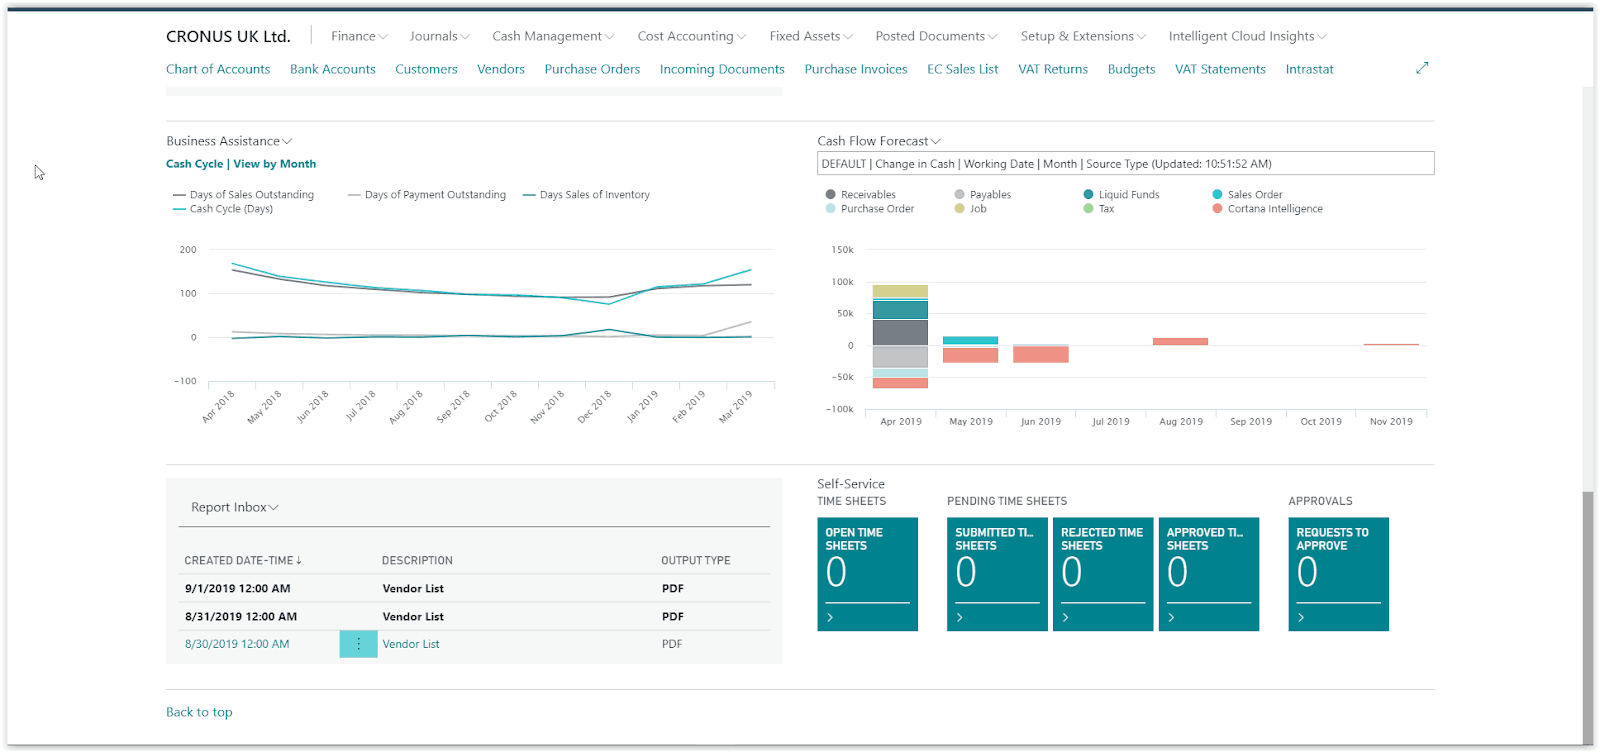
Every time the report is run, you will find it in your Report Inbox on your Role Center. Select the report to open it.

