How To: Working With Inventory Costing In Microsoft Business Central
When creating a new item in Microsoft Business Central, one of the very important fields that you need to define is the Costing Method of the item. The costing method will define how the item’s value will enter, kept and then leave the inventory. There are five costing methods to choose from, FIFO, LIFO, Average, Specific and Standard.
Need Help With Microsoft Business Central?
FIFO and LIFO costing as their rules imply, when an item is sold the value processed is the actual value of either the first or last receipt of the item.
The average costing method calculates the average cost of an item with every positive adjustment.
With the specific costing method, the item is valued with the exact cost of that items receipt.
Lastly the standard costing will use a preset unit cost and when the actual cost is realized the standard cost will be adjusted to the actual through variances.
When you purchase goods, the goods are received into the system through a purchase order. Receipts of goods can also have additional costing elements like freight, insurance, duty, etc. Before posting these additional purchase invoices you will need to assign the value to the specific purchase receipts so that the additional cost is passed to the items.
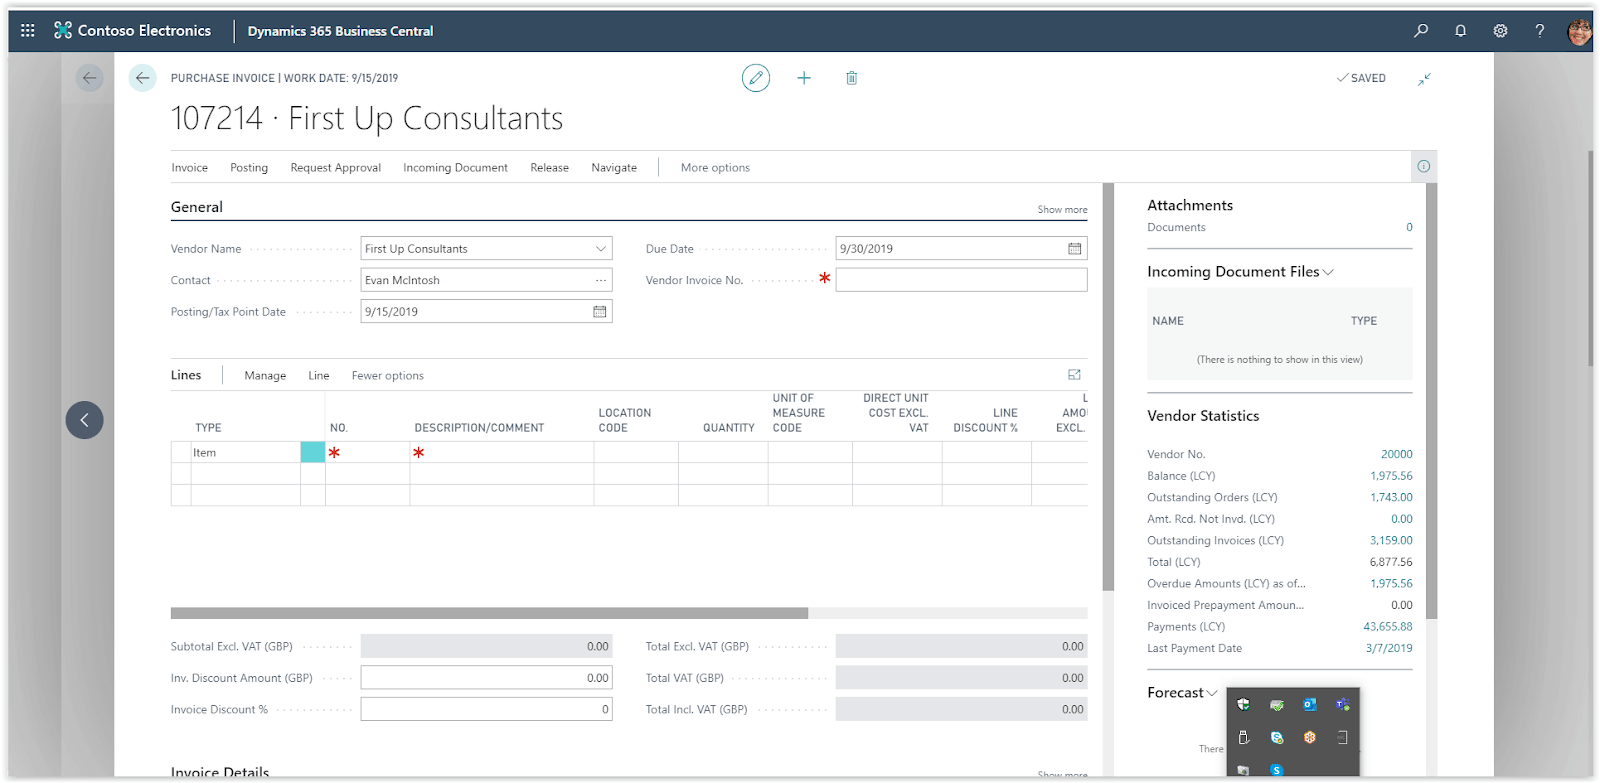
To create a costing Purchase Invoice, choose the search icon at the top right of the screen, type “Purchase Invoices” and choose the Purchase Invoices link on the search results.
From the Purchase Invoices List, Press New to create a new Purchase Invoice. Fill in the vendor and any other information required on the Purchase Header.

On the purchase line choose the Type Charge(Item) and choose the freight charge on the No. field. Set the quantity to one and then set the direct unit cost with the amount for the freight.
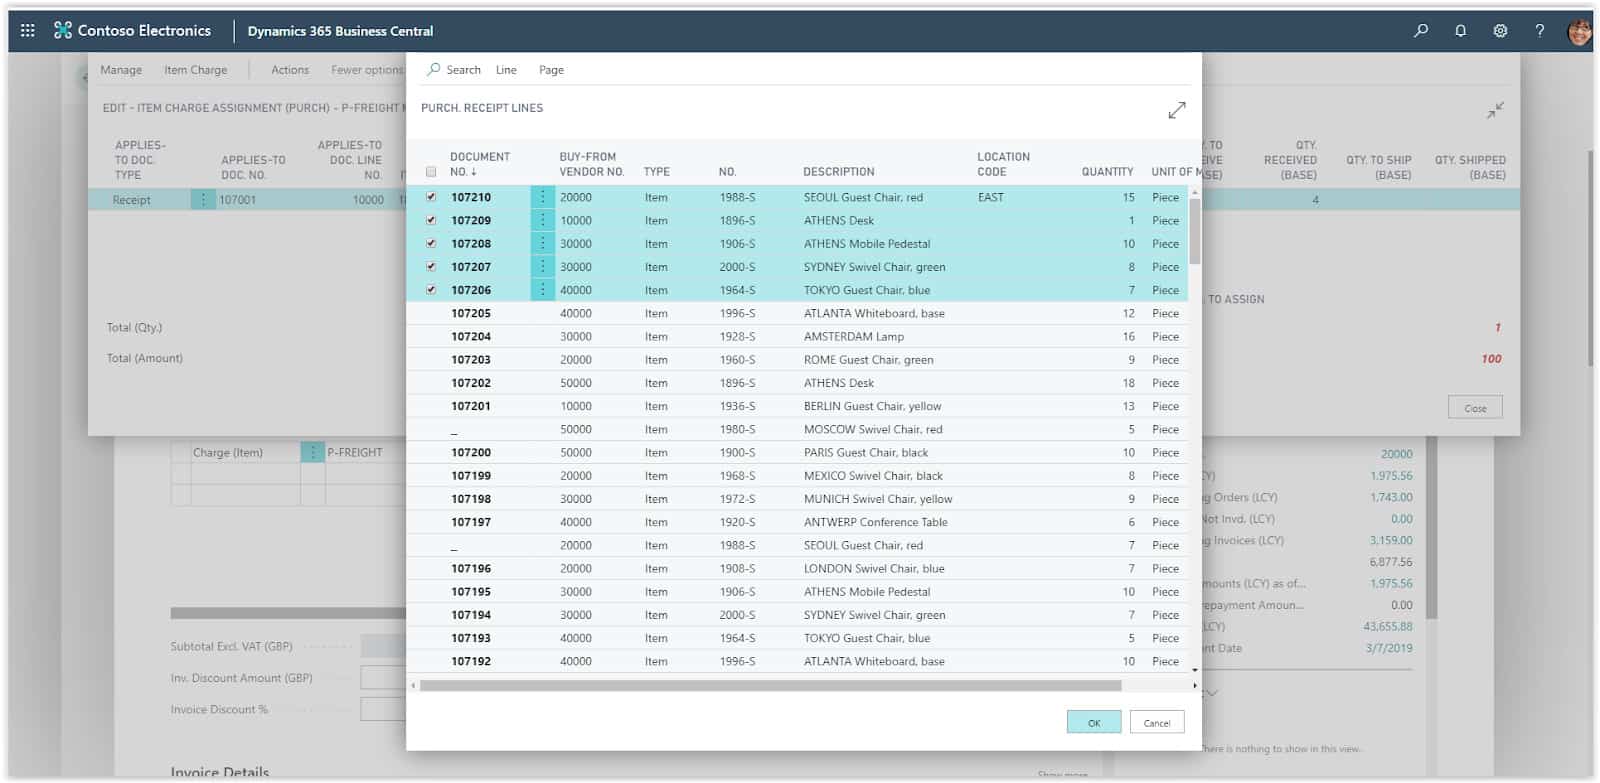
The next step is to assign this cost to a specific Purchase receipt, press Line, Related Information and then the Item Charge Assignment. The item Charge assignment page will open, press Item Charge and then Get Receipt lines to select the receipt lines you want to assign the cost to. Select the lines and press OK to transfer them to the Item Charge Assignment page.

To help you assign the cost correctly press Item charge and then Suggest Item Charge assignment. In the message box that appears you will need to choose how the cost will be distributed to the receipt lines. Equally will just divide the amount equally per line while the other three options will assign the amount based on the amount, the weight or the volume of each line. Press OK.
You will notice that the Qty. To Assign field for each line is populated, press close and proceed with the posting of the Purchase Invoice.
The posting will create additional value entries for each item ledger entry of the items’ receipts, increasing the cost of each item by the amount assigned.
